Keeping your SAN free of clutter when deleting VM’s in VMWare ESX.
The process for deleting VM’s and removing them from your SAn is quite simple, but what you may not know is that the simple way will leave all kinds of remmants, and orphaned files still sitting on your SAN. In this post I will detail everything you need to keep your SAN clean and free of these left over space takers.
1. Delete all snapshots: To delete snapshots for a selected VM, start by logging into your Virtual Infrastructure Client and viewing your inventory. Highlighting the VM and then right click to bring up the drop down menu. Select “snapshot” then “snapshot manager”. Highlight your snapshot (or snapshots) and select “delete all”. You should get a pop up box that says, ” This will consolidate and remove all snapshots for this virtual machine. All the snapshots will be consolidated to a single disk. Are you sure you want to do this?” Select “Yes” and your snapshots will be deleted.
2. Delete and remove your VM from the SAN: To do this simply right click on the VM and select “Delete from disk”. You will get the warning pop up with the “are you sure?” message. Select “Yes” and your VM will be deleted and removed from the SAN. (You will see the “Destroy Virtual Machine” message followed by the percentage to finish in the recent tasks box at the bottom of the screen.)
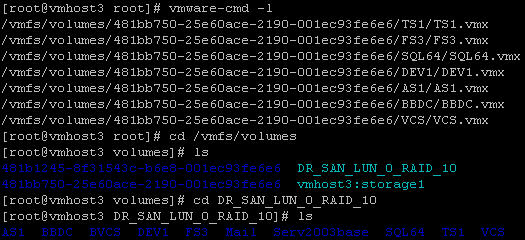
3. Clean up those orphaned and left over files, as well as the directory name from your SAN: For this you are gonna want to putty to your host and issue the following commands after logging in as root (see pictures below).
Here, I have simply drilled down into the SAN and listed it directories.

Here, I have issued the command to remove all the files in the VM directory (in this case MAIL) and the remove the directory itself.

Finally, I listed the contents of the SAN again to make sure it was gone. Congratulations, your finished. 🙂


